Sunday, December 28, 2014

Last dress of 2014


I made this dress to wear on Christmas Day. We normally have Christmas Day at the in-laws', but this year we hosted it at our house and I wanted to make a dress for the occasion. I toyed with the idea of making one in Xmas fabric but didn't really want to spend hours on something that I could only wear once a year.


I've had this light cotton print in my stash for at least 4 years. I'm not sure of the exact fabric type. Pale yellow is not a colour I'd normally wear, but I thought it was very sweet and summery- perfect for our usual 30+ degree Xmas temperatures (which, thankfully, it didn't even get close to this year!).


For the bodice, I used the Lisette Round Trip dress as my block, and modified the neck. I used my favourite, oh so simple skirt- slightly more than A-line, but not quite circular.


Putting this dress together was an absolute breeze. I lined the bodice with an old fitted sheet and left the skirt unlined- I can wear a petticoat underneath for modesty if I need to, but I don't think it needs it. 


The fit is not perfect. There are a few wrinkles, especially on the back which I noticed after looking at the photos. But you know what? I really don't care! Is there really such a thing as the 'perfect' fit, anyway? Surely the more advanced our skills become, the further and more unattainable is our idea of perfection?


This is my last dress of the year and I love it!


Monday, December 1, 2014

Christmas sewing: Festive dress

I wasn't going to make Elizabeth a Christmas dress this year as I made her one last year and I generally try to make clothing last as long as possible. But I realised I have had this Christmassy Michael Miller fabric in my stash for 4 years and if I left it any longer, I wouldn't be able to make anything to fit my girl as she won't be tiny forever.


I laid out 3 different patterns before I found one that would work- being a directional print, my options were severely limited by the one-metre cut of fabric. I had to settle on a pillowcase dress, just like the one I made last year. I added 6" to the length because Elizabeth has grown heaps this year. The print is festive, but not too festive...she can get away with wearing it during the year and not just at Christmas time.


I added a little yoyo detail with a vintage button given to me by one of my students.


Saturday, November 29, 2014

Lisette Round Trip dress

Meet my latest and most fabulous creation! I can't really describe how much I love this dress.


I bough the fabric especially for the project when Spotlight had their 40% off all fabric sale. It's quilting cotton and was reduced to $11 per metre. I bought the exact amount needed to make the sleeved dress, but ended up with about 60 cm of fabric left. Crazy! How do they even come up with the yardages - do they just guess??? I'm sure I will find a use for the remaining bit but it's annoying to have so much left when I was a good girl for once and bought only what I thought I needed!


This dress was super easy to fit. I've come to realise that with Simplicity patterns, pretty much all I need to do is cut a size 8 bodice and taper it to 10 at the waist. I made a quick bodice muslin before cutting into my Eiffel Tower fabric and didn't need to make any changes.


The trickiest part of this was facing the keyhole section, but as long as you read the instructions and have transferred all markings accurately, it's not too bad. I used a tracing wheel and carbon to transfer the markings and it's now my favourite method.


There are sweet little pleats on the skirt and pockets. I'm so used to having dresses and skirts with pockets now that it feels weird without them!


I love this so much that I've already cut out my next version, this time with the cute collar and no sleeves.

Tuesday, November 25, 2014

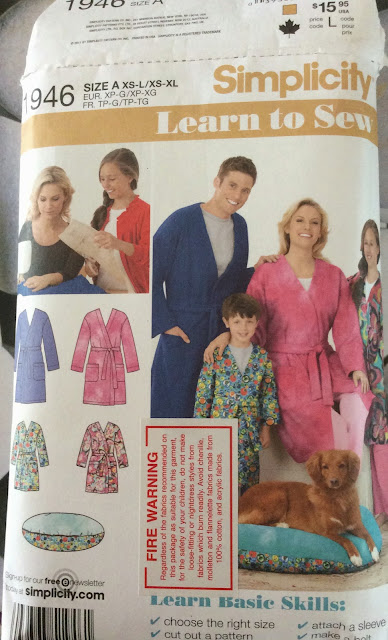
Christmas sewing: Simplicity summer dressing gown

Another handmade Christmas gift has been ticked off the list.

This is for my mother-in-law. A couple of weeks ago, my daughter went to a 6th birthday party. It was a pamper party, with the girls having a mini day spa experience including their own dressing gown made from vintage print cotton. She loves her dressing gown so much that I decided to make one for her Gran.


I found this pattern in Spotlight. There were better options, but Simplicity patterns were two for $10 and I can't justify paying full price for Big 4 patterns, so I got this (and maybe three other little girls' patterns too...). It's very simple, with two big patch pockets, a facing (I would have preferred a contrast band, but oh well), and a belt with belt loops. The main fabric is some lovely cotton that I found in an op shop last year, and the spotty one is poplin from Spotlight.


I wanted it much shorter for summer so reduced the length by 11" and the sleeve length by a whopping 12". It came together pretty easily. I just wish I had a fatter mannequin to photograph it on as it looks crap hanging on my size 8 one.

Sunday, November 9, 2014

Christmas sewing: Kitschy Koo skater dresses

So I decided that there is to be no more selfish sewing until I've finished all of my Christmas sewing. I'm not doing a whole heap as I don't want to stress myself out, but I knew I wanted to make a couple of dresses for Elizabeth. I was going to make cotton ones but then I saw some photos my friend posted on her Facebook page of some Kitschy Koo skater dresses she had made for her daughter. I got chatting to her about the pattern and she won me over by telling me how quick and easy it is to sew.


This is the first PDF pattern I've sewn and I have to admit that I found it kind of fun to put together. Cutting out and taping together all the bits reminded me of being in art class as a kid. I loved that I could just cut all my fabric on the floor using my cutting mat and rotary cutter, instead of cleaning everything off the dining table like I usually have to. It took me about 6 minutes to cut all my pieces. Win!

The first dress took me about twice as long as I read through all the instructions. My friend suggested I sew all the bands on in the round, and not flat as directed in the instructions. I find this looks much neater as the band seams are hidden inside the band.


I used my regular maching with a lightning bolt stitch and ballpoint needle for all except the side seams. All edges were finished with the overlocker and the side seams sewn with the overlocker. I hemmed the skirt with my twin stretch needle and am really happy with the result.

All in all, very cute, very quick dresses! I also bought the lady version and will be making one as soon as my selfish sewing ban is over!

Saturday, October 25, 2014

Lisette Round Trip Dress #2

Hot on the heels of my Eiffel Tower version of the Round Trip Dress comes this little cutie.


I cut this out two weeks ago and only finished it last night, partly because I haven't had a lot of sewing time and partly because I wanted to take it slowly and make no mistakes.


I knew I didn't need to make any adjustments other than taper the waist up to a size 10. This time I made View B with the cute little Peter Pan collar and no sleeves. I used Sew Colette's tutorial for finishing the armholes with bias binding.


The skirt on this one is a bit shorter than the last one due to fabric restrictions. I think this version is really cute and playful. The fit is not perfect but I'm not too fussed about it.

No more selfish sewing for a while now...Christmas is fast approaching and I have a few gifts to make!


Tuesday, September 16, 2014

Lisette Traveller Dress

I was being such a good girl, sewing only garments that I'd planned to sew, using fabrics purchased especially for that project...but this time I made something I hadn't planned to do for a while.

I recently purchased a second hand Modcloth shirtwaist dress from EBay ( breaking my 12 month clothes buying ban....whoops!) and loved the style. Whilst perusing my patterns and fabrics a couple of Saturdays ago as I always do when choosing my next project, I decided to have a go of this lovely pattern that I bought not long ago.


I bought this knowing I will never make views A or B...they just are not my style. It was View C that grabbed my attention. It has everything I want in a shirtwaist dress- cute puffy sleeves, gathered skirt, and not-too-difficult one piece collar.

I cut the bodice from some beautiful quilter's cotton and the skirt from some sage green polka dot cotton. This is the exact same fabric combo that I used for my Spring Dress last year...


Size wise, I cut the bodice as a size 8 and tapered to a 10 at the waist. I basted all the major seams to check the fit before sewing it properly. Thankfully it fit me pretty well- I didn't even have to touch the darts! 


This dress was an absolute joy to sew. I really took my time with it and it shows! I loved edge stitching the button packets and collar. Check out this gorgeous placket!


The skirt is different to any other gathered skirt I've made, with the gathers starting a few inches either side of the centre front. I really like the effect as it doesn't make my tummy look like it sticks out!

My favourite part is the sleeves of puffy adorableness. I will have to cut the sleeve band at least a size larger next time as they are really tight thanks to my workout regime. There's only about 1cm of ease in them. I left the sleeve seams unfinished in case I wanted to get rid of the sleeves, but after wearing the dress all day, I discovered it wasn't uncomfortable enough to get rid of these beauties. How flippin' cute are they?!


I'm very happy with the fit. I could probably increase the side seams a bit to get a neater fit, but I fear that may make it a bit too uncomfortable. 


The buttons are just cheapo ones from Spotlight but I love them.


All in all, I love this dress and I cannot wait to make another one!

Tuesday, September 2, 2014

New Look shift dress

Here is my latest labour of love. This was my first time making a shift dress. I thought it would be super easy to get the fit right, but on the other hand, I wasn't sure whether the shape would suit me.


I bought this gorgeous linen from Spotlight when they had their 40% off all fabric sale about a month ago. I knew I wanted to make this dress with it, so I bought the exact amount I needed for it. Another first! I'm not sure of the composition, but it's definitely a blend as it doesn't wrinkle like crazy.

I cut the top half on the smallest size, and the bottom half on the next size up. I know I say this every time, but I really need to learn to cut two sizes up on the bottom! Who knew I was so pear-shaped? Not me!

I took my time with this because the fabric was expensive by my cheapass standards and I didn't want to ruin it. I wanted to add inseam pockets, which I did, but when I tried it on with the pockets, it looked terrible. They were too low, and they made the dress puff out at the sides, giving me an Oompah Loompah effect. So I had to unpick them, under-stitching and all!


That disaster aside, it came together easily. The neck band was a little fiddly, and next time I will add the band before inserting the zipper so it will have a cleaner finish. But check out my stitching in the ditch! It's so neat, you can't even see it!


I didn't like any of the sleeves on offer with the pattern, so I added my favourite ones- the darling little pleated sleeves from New Look 6000. How cute are they?


I ended up having to reduce the seam allowance to about 5mm on the bottom half to make it sit right. I blind stitched the hem with my machine.


I really love this dress and the fabric. I think my fears of looking like Homer Simpson in a muumuu in this were unfounded!
Next I think I will make a shorter, plain black version for a super classy LBD.


Monday, August 25, 2014

Not-so-jiffy Jiffy dress

So I picked up this pattern a while ago for a ridiculously cheap price. Before I'd finished my curtain making (which I have finally finished...woohoo!) I decided I needed to make myself a quick dress. It's called Jiffy, so that means it's fast, right?


I stupidly thought this was going to be easy to fit. I don't know why, but I thought it was a simple shift dress and completely overlooked the fact that it has French darts. It also has  a centre front seam and shaping in the back. Suffice it to say that when I put it on, it was a disaster. Too loose around the bust and really tight around my butt and waist. When will learn to cut the bottom half two sizes bigger than the top???


Anyway, obviously I resolved the fitting issues- it was just a matter of putting it on, pinning, unpicking, sewing, putting it back on...about 10 times. But I got there in the end. 

The fabric is pique and was left over from a previous dress. I still have enough left to make a dress for my daughter. This fabric has great structure.


This dress is a really cute shape and I love it. I will make another one in summer but will have to do some tweaking to the pattern. Also, it's not bra friendly (as you can see) and I hate my bra showing so I will need to fix this.


Sunday, July 27, 2014

Instant gratification

I haven't blogged for a long time because I've been busy making 3 sets of curtains and sheers for the enormous windows at the front of the house. I just have to buy fabric for the last one and then make it and I'm done. Even though curtain making is not exactly difficult, there is a lot of measuring involved, and tedious sewing of loooooooong, straight lines, so it's taken longer than I would have thought. I wanted to break up the tedium a bit with some quick, easy projects.

I've made a couple of Sewaholic Renfrew t-shirt dresses, so I thought it was time I tried the pattern as it's intended- a t-shirt. I made the long sleeved version with the gorgeous snugly cowl.


For this project, I did something I rarely do. I went out and purchased fabric specifically to make a certain project. Usually I just grab whatever is cheap and it languishes in my stash for years because I have no idea what to do with it.

This slinky jersey knit was on special for a good price (can't remember but probably under $10) so I grabbed the exact amount I needed to make the Renfrew. It's such nice stuff- really soft and slinky, and not that cheapo stuff that's transparent when you hold it up to the light.


This top took me about 90 minutes to sew, using only the overlocker. It would have been quicker but the onverlocker and I were not seeing eye to a for a while. This is a lovely make that I am going to wear heaps if our winter decides to come back. Our weather is really shitting me this year- we had no autumn, with a summer that lasted until the end of May, and we had some lovely cold weather at the beginning of July and now it's hot again! Gah!


I just whipped this up for my girl and it took about 45 minutes including cutting. I had 3 pieces of coordinating fabrics that were too small to do anything with, so I cut them into strips, sewed them together, added some waist elastic and ribbon trim, and voila- a cute skirt! She loves it.


What's your favourite quick make?

Sunday, July 6, 2014

Sewaholic Renfrew dresses

I made these babies a while ago but hadn't had any opportunities to take photos of me wearing them yet. They are quite far removed from my usual dress style, being quite slinky and clingy, but I finally got the chance to wear one last night to my mother-in-law's 70th birthday party.


For my test run, I chose some super slinky knit that I purchased about 5 years ago when I first started sewing, thinking that sewing with stretchy fabric would be easy. Derrrrp. I traced the Renfrew pattern on a size 2, tapering up to size 4 at the waist, and made it dress length by continuing the angle of the side seam for an extra 13 inches.


I knew I wanted to have a lining so that the whole world wouldn't have to look at my undies outline, and also to give it more warmth (our climate is far too hot to wear poly knits with long sleeves except from June- August). I used some unknown knit that a friend gave me a while ago. I lined it by basting the lining to the shell and treating them as one layer. This mostly worked well, except when it came time to add the bottom cuff. The two layers were behaving differently and there is a bit of kinkiness going on down there.


Another dumbass thing I did with my first version was to cut TWO BACKS instead of a front and back like normal people would usually do. The dumbest bit was I didn't even realise until I finished it, put it on, and noticed the neck was far lower than it shoud be. Oh well- lesson learned!


The second one was much easier. I left out the cuff, which in hindsight I should have kept, as I discovered last night that I am flashing way more leg than I am comfortable with (my husband loves it, of course). I only sewed the lining and shell together at the neck and armholes, and this worked much better than the last version.


I constructed the entire garment on my over locker, and I seriously can't believe how fast it was. Guys, I believe I have conquered my fear of knits! I know the fit is not perfect, but look at that cowl. Gorgeous! 


I bought some slinky black jersey to make a normal t-shirt length one to go with the black Thurlows that I intend to make soon. This will be my new orchestra uniform. Hopefully I will get it made before our next concert.

Thursday, June 19, 2014

Mish Mash Dress

I decided to make a really quick dress on the weekend and thought I should use a bodice that I'd had some success with, the New Look 6910. I wanted sleeves so I can wear it now in the cooler months, and the Emery sleeves are simple so I used them. For the skirt I chose New Look 6886, which is some kind of circle skirt- a quarter or half circle, I guess. Probably quarter.


This did not prove to be the fast and easy project I'd hoped it would. The fit of the bodice was really off, and the lining was too short in the centre of the waist. I noticed this the last time I used this particular poplin as a lining. It has no 'give' in it at all, and it shrinks when pressed. I almost threw the whole thing into the 'fix at some stage in the future' pile because the lining was pulling up the front of the bodice, but I had a lightbulb moment and decided to chop off most of the lining, overlock the edges, and turn it into an all-in-one facing. It worked a treat! Except of course I hadn't finished my seam allowances becaus the bodice was going to be lined, so I need to do something about that. However, I was too impatient after 4 nights work on this damn dress and just wanted to wear it to work today, so the seams will have to wait!


I chopped an inch off the Emery sleeves and I think they look cute a bit shorter. I also had to take the side seams and princess seams in a bit to get rid of some excess fabric. The fit is pretty good now.


I think this is a really pretty dress but it's given me a bit of a smack in the face and made me realise something...I really need to learn to slow down and do things properly. This means making a muslin, no taking shortcuts, no setting myself deadlines, and taking the time to enjoy my sewing. 


On that note, here are some patterns I picked up from Spotlight yesterday. They had a great deal- 3 Simplicity patterns for $10! I'd been waiting for them to get 1419 in stock so I'm stoked that I got it, and these other two cuties, for such a great price!